As discussed earlier, for the mixing process let’s open a new project.
I’ll load all the audio stemsthat I exported beforeusing the Stems Buses set up in mycomposing template, and I’ll do the mix in this new mixing project with all the additional EQ, compression, reverb, and automation.
*TOP TIP*: Doing this will help separate the composing and arranging process from the sound mixing process.
A common downside of doing everything “in the box” is that some of thedesired elements of the past are lost. For example, using analog hardware would give the track a very particular quality. Most consoles would give the mix a warmth or a softness which is still desired today.
Luckily most of the famous desks have been emulated digitally and although they don’t get the exact physical qualities of their analog counterparts theycome very close.
This takes us to:
Console Saturation
I run every track through a console or tape emulator to add a bit of analog saturation. In the past, I used the built-in console emulator from Sonar.
I set the Trim and Drive to around “four”, which is a fairly conservative setting.The effect is cumulative over multiple channels, so you will hear the difference.
These days, I use Cubase’s Magneto II.
*TOP TIP*: It is important to start the mix while the console emulators are already in place and do the mix with all of them enabled.
These types of console-emulator plug-insgenerate harmonic overtones through distortion.However, it will have some impact on the dynamics, and when pushed too hard, it would begin to limit, which might affect the sound in a negative way.
The first thing that you need to understand about console emulators (or any other kind of plug-in, really) is that you have toallowfor headroom inevery channel.Any plug-in that you add will boost some frequencies. Because you have this frequency boost if you run your sliders up to 0dB you are already smashing and overloading the input side of any plug-in, and some compression will happen within the plugin, even if you do not want it.So keep a little less signal level going in and everything will be a bit happier.
When you go about it the right way, using console or tape saturation plugins, you can make your project sound a bitbrighter, a bitthicker, and get thisnice euphoric warm mid-rangethat happens naturally with tape. In short, you can get a sound that wouldn’t have been achievable with only EQ or other processes.
Reverb
I usually insertdifferent reverbs for different stems, often using Spaces and B2 for my orchestral instruments.
By using different reverbs or different reverb settings, youcreate separation in your mix and gain clarity. You do not want to use the same reverb for all instruments.
Although reverb is a very important component of an orchestral track, you shouldavoid reverb build upby not overusing it.
Also, as said before,cut the low frequencieson your reverb plug-ins. All the good reverb plugins will come with some sort of EQ built in. Make sure to cut the low frequencies to the reverb on all the stems.
When mixing orchestral music, you want to useconvolution reverb first(to put the instruments in a “room”) and then add a high-qualityalgorithmic reverb(if necessary). However, there are some orchestral instrument libraries that have been recorded in very good rooms, soadding convolution reverb to some of these may be unnecessary.
Now is when everything starts making sense: you separated the instruments, exported stems, and now you are applying different reverbs to different groups of instruments. That way, you are ensuring separation and gaining clarity.
Remember these rules:
More reverb for long notes and less for short.
I recommend around 2.6 second-long reverbs for long-note orchestral stems, and a bit longer if they are really long. Don’t be too liberal though, or the sound will become too muddled.
For short notes, 1.5s should be the max in order to keep the sound clear and crisp. I may even go with even shorter reverbs.
Percussion would follow the same rule: keep it dry by applying very little reverband keep it to 1s or less.
I do not ownhardware reverb units, and I don’t see them as being necessary. They can make a small difference, but good reverb plugins can get your sound to be outstanding.
In case you have a chance to use one of those hardware reverb units, the Lexicon 960 (or the PCM96) works great for orchestra. I use the “Huge Hall + Stage” patch with 2.1s for shorts and 3.5s for longs. The System 6000 works great with synths and choir as well.
Equalization
We have done most of the EQing during the composing process. There is not much more that we need to deal with here if we have done a good job before.
Sometimes though, you may want to slightly EQ some stems.
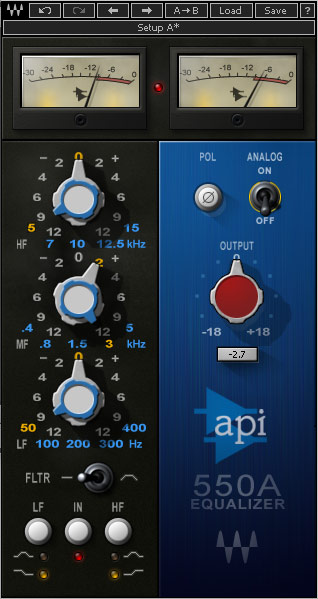
For example, I like toboost the strings a little bit around 3500Hzto give them some air.Air is a common term for high frequency.
This is another EQ forlow strings, boosting a little bit with 125Hz and 1330Hz:
I never compress orchestral instruments. If I am mixing an orchestral track, Ionly compress percussion.
For percussion, I like having, at least, threeseparate stems(high, mid, low) and applying different compression to them. If I just have one stem, I run it through a multi-band compression. I find the Waves C6 to work well with percussion. Usually,
I set a ratio of 2.8:1 and make sure not to cut more than 3dB. I then give it a -2dB gain.
If I have non-orchestral percussion, I separate thesub-bassdrums(boomers...etc). Compressing these a little more can gain clarity out of them.
I would alsocompress synths(especially the percussive ones) but avoid compressing synth pads.
Other Plug-ins
In short: widen the strings, which will help the whole mix to sound wider and will create some space for other instruments to sit in the mix. I use S1 Imager.
I use McDSP Analogue Emulator (a tape emulator plug-in) on strings and brass. These are the settings I use for strings.
Waves NLShelps brass, especially horns, to sit well in the mix.
Automation
Music is movement. You need tocreate movement in your mix, especially when you are using samples.
There are different types of volume automation that you can apply to your mix, with every one of them serving a different purpose. The first type of volume automation will make your stems breathe and give them vitality.
I recommend having acontrol surface for this one.I used the Mackie Control Universal Pro in the past, but it takes too much space on my desk, then I moved to the BCF2000 which is more compact. ThePresonus Fader Port, which only has one fader, is smaller. One fader is all you need, actually.
For all long-note stems:
Activate the “Write” mode
Hit “Play”
Grab the fader and move it up and down slightly but quickly (as quick as you can, several times a second). A good rule of thumb is to add 1dB up and down with quick movements to give it a vibrato type of feel. Remember, it is something subtlebut will add some movement, life, and activity to your stems. I do this just for long notes type of stems.
As a result, you enhance that stem and give it some extra movement and realism.
There is another type of volume automation. This one slightly readjusts the mix and levels (balance) as the music progresses and helps for every element stands out when it needs to be heard.
Even though you have balanced every instrument during the composing process, you could enhance balance by raising the volume a little bit for those moments when an element needs to stand out.
It can sometimes be even more effective to subtly lower the volume of other elements that you don’t want standing out as much, allowing you to create space for the more dominant elements that you want to cut through. It is the same “cutting” concept that we apply for eq, but with volume.
Check out how much volume automation is going on in this track.
Finally, you can alsoautomate the panning. The idea here is to not have tracks moving left to right as an effect (those types of effect should have been created during the composing step). Rather, slightly reposition the stems or instruments for better spacing.
Remember that not only can you automate the overall pan, but also thevolume of left and right parts of a stereo track(for example, lowering the left channel volume of a wide shaker when the high strings staccato motive needs to stand out).
Automation should not finish here, though.You can automate everything in a DAW.You can automate reverbs, EQ, and any type of plug-in.
A very effective automation with reverb is automating a verylong reverb at the end of a climactic trailer track.You could automate it so that the reverb fades in at the very last bit of the piece to create a nice, long, dense reverb tail. Such a reverb would have killed the track if applied without automation, but it works very effectively when it’s applied just at the end.
Be creative with automation. Use your ears and adjust the mix as the track progresses. Create a moving mix and make your music interesting!
Alright, enough theory. Check out this video to see how these concepts apply in real life.
In the next post, we will look at polishing the mix so it is ready to be delivered to the client. This process is calledMastering.
Out Of Your Orchestral Mockups in 10 MinutesOr Less!
When I started in Hollywood 9 years ago, and I wanted to learn how to mix my orchestral mockups. I asked the top Mixing Engineers and Score Mixers in town if I could sit down in their studios while they were mixing soundtracks. Some of them were happy to have me and I would take notes of everything I'd see and I'd ask questions at the end of the session. I've compiled them all for you in this guide!!